Ignition Coil Replacement On A Generator

This blog is a step-by-step instruction for replacing the carburetor on a Briggs and Stratton generator engine. The most common reasons for replacing the ignition coil is when the engine won’t start and testing proves the ignition coil to be at fault.
Replacement
Before you begin the replacement, you need to make sure the engine has cooled and remove the wire and boot from the spark plug to prevent the engine from accidentally starting.
Step 1: Use a 5/16 inch socket to remove the mounting screws securing the air filter cover and pull the cover and filter off. Place the choke lever in the choke position then pull the lever up to remove.
Step 2: Detach the breather tube from the filter housing. Now use a 10 millimeter socket to remove the mounting nuts securing the housing. Pull the housing off of the mounting posts and move it out of the way.
Step 3: Use the 10 millimeter socket to remove the bolt securing the right side of the starter housing. Loosen the bolt and nut on the left side to allow the plastic shield to be removed.
Step 4: Use an e5 external torques bit to unthread the mounting stud. Now use the Torx bit to loosen the carburetor mounting posts. Pull the carburetor forward to give yourself enough room to remove the starter housing.
Step 5: Disconnect the ignition coil wire and confirm that the flywheel magnets are rotated out of the way. Then use a 9/32 inch socket to remove the mounting screws securing the old ignition coil. Pull the old coil free and you are now ready to install the new one.
Step 6: You can start by transferring the spark plug boot and sleeve from the old coil to the new one. Now position the new coil on the engine and thread the mounting screws loosely. Pull the coil back and tighten the screws. Insert the provided measurement card between the coil and flywheel then rotate the flywheel so the magnets align with the coil. Loosen the screws to align the coil the correct distance from the flywheel. Retighten the screws and remove the measurement card, then realign the wire to the new coil.
Step 7: Now reposition the starter housing, push the carburetor back and tighten the mounting posts. Rethread the mounting stud, reposition the plastic shield and tighten the nut and bolt to secure. Replace the bolts to secure the right side of the starter housing. Make sure the choke shaft is in the choke position then push the choke lever into place. Reposition the air filter and cover, rethread the mounting screws to secure. Attach the wire and boot to the spark plug and the engine should be ready for use.
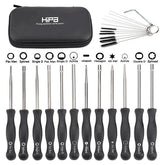
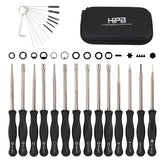
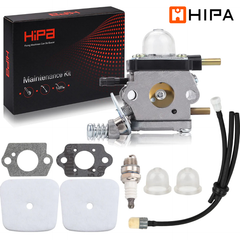
Revive Your Machine With Hipa All-In-One Kit
Hipa's parts kits make it quick and easy to maintain or restore your lawn and garden equipment. Whether you need replacement parts, tools, or help, Hipa has the small machine solution for you.


